This step-by-step guide will help you get a website up and running with WordPress*, installed on an Amazon EC2 virtual machine (also known as an “instance”). You will go through how to configure and launch an EC2 instance, how to get your WordPress username and password, and how to log into your WordPress admin portal. Everything done in this tutorial is free-tier eligible.
Open the AWS Management Console and you can keep this step-by-step guide open. When the screen loads, enter your user name and password to get started. Then find EC2 under Compute, and double click to open the dashboard.
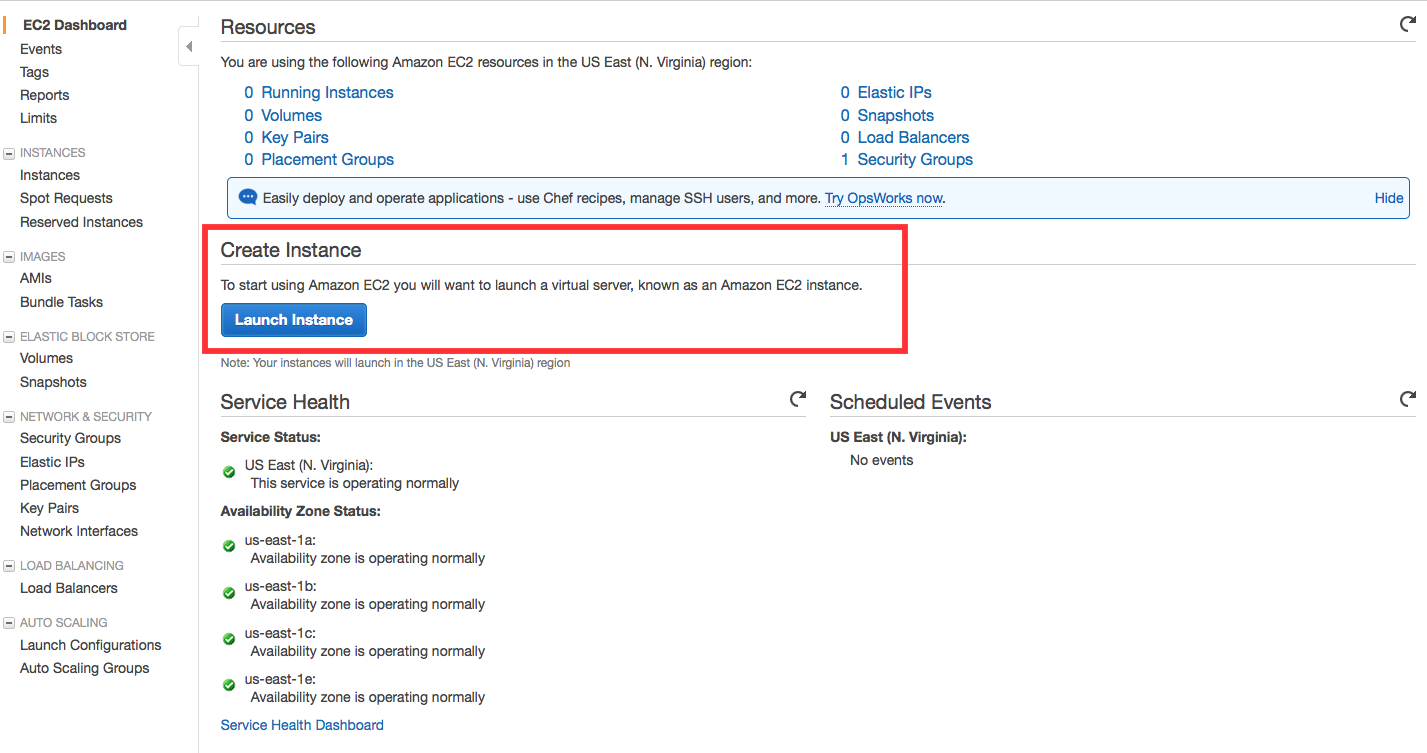
Now you are in the EC2 dashboard, click Launch Instance from the dashboard to create and configure your virtual machine.
Now you're in the Amazon EC2 configuration wizard, we will be using an existing
Amazon Machine Image (AMI) from the AWS Marketplace that has WordPress
already installed. The AWS Marketplace provides access to thousands of pre-configured
images for common pieces of software.
Amazon Machine Image (AMI) from the AWS Marketplace that has WordPress
already installed. The AWS Marketplace provides access to thousands of pre-configured
images for common pieces of software.
a. Click on AWS Marketplace on the left-hand side, search for WordPress, look for
WordPress powered by BitNami, then click Select.
WordPress powered by BitNami, then click Select.

b. You will be presented a detailed pricing page. In this case, the price will be $0.00 for the software regardless of the size of the instance that you use.
Scroll to the bottom and click Continue.

c. For this tutorial, we will be using a free-tier eligible t2.micro instance. Click on t2.micro in the Type column (it should be the first one), then click Next: Configure Instance Details. It may take a few seconds to load.
On the following screens, click Next: Add Storage and then Next: Tag Instance.


